Wednesday 29 April 2015

Blog-Worthy Meal

I bet you're wondering what could possibly make a meal blog worthy? For me, it's quite simple. This meal was made by my son and his girlfriend (best reason), involved a lot of ingredients, quite a lot of preparation, various pots and pans, plus it was delicious (next best reason).
Since I was not planning to write a post for this meal, I didn't take photos until near the end. I still managed to capture some of the preparation. 

Our son poses next to the chopped garnishes along with his refreshments of choice. A year at University has matured his taste in drinks.
I can tell you, my son and his girlfriend worked well together and the kitchen smelled amazing, making my mouth water with anticipation. 
 
To commemorate the occasion, I took some photos of the smiling cooks. They filled two huge pans with chicken enchiladas following this recipe found on the Food Network. 
My parents were invited to join us and brought dessert - white chocolate and cranberry truffle cake (not shown) - to complete the menu. Too bad my husband missed out as he was away in Toronto.
Once our meal was served, we all dug in to enjoy a truly tasty and definitely blog-worthy meal. Luckily my husband won't miss out entirely. There was one full pan of enchiladas and half a cake left over. 

We plan to enjoy the flavours of this Blog-Worthy Meal again tonight. 


Be the first to comment - click on No comments: below


Sunday 26 April 2015

Scored Four More

I'm talking about chairs of course. A couple weeks ago I wrote about my Sunday Curbside Scores including two free chairs for our son who is moving into a house in Guelph with five other students. He liked the chairs, but needed four more to complete the set.

Last weekend I Scored Four More at a yard sale in our neighbourhood. These chairs cost just $10 each and the nice young man running the yard sale offered to deliver them for free. I was walking the dog, our car was not at home and I had brought no money, so I gladly accepted his offer.

Our son likes these chairs better than the other two even though they are not nearly as sturdy.
My husband spent some time gluing the loose bits and replacing some screws. One chair is missing a support piece which he might try to fix.
 
He also removed the original metal and rubber feet then stuck on thick felt pads to prevent scratching the floor.
I was happy to have Scored Four More wooden chairs for our son. Now I can stop looking for furniture bargains. My job is done. 


Be the first to comment - click on No comments: below

Crochet Kitty Pattern

CROCHET KITTY PATTERN

PDF Version


Materials used:


partial ball of Patons Divine (#5 bulky weight yarn) in icicle white
partial ball of #4 worsted weight yarn in blue (100% acrylic)
partial ball of #4 worsted weight yarn in beige (100% acrylic)
Hook size = 3.25 mm 
yarn needles to join pieces
Polyester Fiberfill for stuffing
Small amount of black yarn (for eyes)
Small amount of light pink yarn (for mouth)

Stitches used:


ch - chain stitch
ss - slip stitch
sc - single crochet
inc - sc increase (2 sc in same stitch)
sc2tog - single crochet 2 together aka dec - decrease
Magic Circle - see how here (start each piece with magic circle)

Time to Complete - 10 hours (approximately)
Finished size - 11 inches tall

Legs (x2)


Start with blue worsted weight yarn.
R1 - 6 sc (6)
R2 - inc x6 (12)
R3 - (sc inc) x6 (18)
R4 - (2 sc inc) x6 (24)
R5-R6 - sc around (24)
R7 - sc2tog x4 + 16 sc (20)
R8 - sc2tog x4 + 12 sc (16)
R9-R13 - sc around (16)
R14 - (3 sc inc) x4 (20)
R15-R16 - sc around (20)
R17 - (4 sc inc) x4 (24)
Switch to white Patons Divine yarn
R18 - sc around (24) 

Body


Use white Patons Divine yarn to join legs
R19 - sc around (48)
R20 - 23 sc inc - sc - inc - 22 sc (50)
R21 - sc around (50)
R22 - sc around (50)
R23 - sc around (50)
R24 - sc around (50)
R25 - sc around (50)
R26 - sc around (50)
R27 - sc around (50)
R28 - sc around (50)
R29 - sc around (50)
R30 - sc around (50)
R31 - (3 sc dec) x10 (40)
R32 - sc around (40)
R33 - sc around (40)
R34 - sc around (40)
R35 - (8 sc dec) x4 (36)
R36 - sc around (36)
R37 - (4 sc dec) x6 (30)
R38 - sc around (30)
R39 - (2 sc dec) x6 (24)
R40 - sc around (24)
R41 - (1 sc dec) x6 (18)
R42 - sc around (18)
Finish off leaving a long tail for joining.

Arms (x2)


Start with beige worsted weight yarn.
R1 - 6 sc (6)
R2 - inc x6 (12)
R3 - (sc inc) x6 (18)
R4 - sc around (18)
R5 - (4 sc dec) x3 (15)
R6 - sc around (15)
R7 - (3 sc dec) x 3 (12)
Switch to blue worsted weight yarn.
R8 - sc around (12)
R9 - (4 sc dec) x 2 (10)
R10-R29 sc around (10)
Switch to white Patons Divine yarn
R30 - sc around (10)
Finish off and cut yarn leaving a long tail for joining. Stuff only hands and part way up arm.

Head


Use beige worsted weight yarn.
R1 - 6 sc (6)
R2 - inc x6 (12)
R3 - (sc inc) x6 (18)
R4 - (2 sc inc) x6 (24)
R5 - (3 sc inc) x6 (30)
R6 - (4 sc inc) x6 (36)
R7 - (5 sc inc) x6 (42)
R8 - (6 sc inc) x6 (48)
R9 - (7 sc inc) x6 (54)
R10 - (8 sc inc) x6 (60)
R11 - sc around (60)
R12 - sc around (60)
R13 - sc around (60)
R14 - sc around (60)
R15 - sc around (60)
R16 - sc around (60)
R17 - sc around (60)
R18 - sc around (60)
R19 - sc around (60)
R20 - (8 sc dec) x6 (54)
R21 - sc around (54)
R22 - (7 sc dec) x6 (48)
R23 - (6 sc dec) x6 (42)
R24 - (5 sc dec) x6 (36)
R25 - (4 sc dec) x6 (30)
R26 - (3 sc dec) x6 (24)
R27 - (2 sc dec) x6 (18)
R28 - (2 sc dec) x3 + 6 sc (15)
R29 - sc around (15)
R30 - sc around (15)
Finish off and cut yarn leaving a long tail for joining. Stuff head and neck firmly to hold shape.

Hood


Use white Patons Divine yarn.
R1 - 6 sc (6)
R2 - inc x6 (12)
R3 - (sc inc) x6 (18)
R4 - (2 sc inc) x6 (24)
R5 - (3 sc inc) x6 (30)
R6 - (4 sc inc) x6 (36)
R7 - (5 sc inc) x6 (42)
R8 - (6 sc inc) x6 (48)
R9 - sc around (48)
R10 - sc around (48)
R11 - sc around (48)
R12 - sc around (48)
R13 (8 sc dec) x4 + 4 sc (44)
R14 - sc around (44)
R15 - sc around (44)
R21 - sc around (44)
R22 - ss loosely around (44)
Finish off and cut yarn leaving a long tail for joining. Position on head as shown in photo above. After attaching head to body, I like to wrap the tail from the hood around the neck to cover joining stitches.

Ears


Use blue worsted weight yarn.
R1 - 6 sc (6)
R2 - sc around (6)
R3 - (sc inc) x6 (12)
R4 - sc around (12)
R5 - (sc inc) x6 (18)
R6-7 - sc around (18)
Finish off and leave a long tail for joining. Fold ear in half and stitch opening closed. Attach to hood with a slight curve to look like a kitten ear.


Tail


Use blue worsted weight yarn.
R1 - 6 sc (6)
R2-20 - sc around (6)
R21 - (sc inc) x3 (9)
Finish off and leave a long tail for joining. Do not stuff before joining.

Refer to the photos in my last post about Crochet Kitty before joining all the parts.


Be the first to comment - click on No comments: below

Saturday 25 April 2015

Crochet Kitty

After my Crochet-Free Week, I was ready to get back at it. This time I crocheted a Kitty using beige and blue worsted weight acrylic yarn and Patons Divine icicle white chunky yarn from my stash. 

Crochet Kitty poses to show off her pointy ears and long tail. Isn't she cute in blue and white? I chose blue partly because 'blue point' is an actual cat colour and partly because I have lots of blue in my stash.
 
 
Crochet Kitty joins the rest of the gang and feels right at home. 

am slowly filling the basket with critters made from my stash. I wonder how many more I can make? I could probably continue making critters for the rest of the year with the pile of yarn I've accumulated which makes these both economical and practical.

I did buy another bag of stuffing this week as critters use quite a lot.

I also have to buy another 3.5 mm Addi hook as mine broke when I pulled too hard on snagged fluffy yarn. I expect this hook was flawed as breakage is not a common problem. I love using Addi hooks and still recommend them as a good ergonomic option. Gauge is not that important with toys, so I just switched to a 3.25 mm hook to finish.
I will be sharing a pattern for this Crochet Kitty in a separate post, hopefully soon.


Be the first to comment - click on No comments: below


Sunday 19 April 2015

Crochet-Free Week

This week I decided to take a break from crochet. I am happy with my latest projects, but four critters in four weeks including posts and patterns is rather a lot of time spent sitting. Besides the weather has finally improved, it's perfect for biking and spending time outside. 

This week, I rode my bike to work every day except Monday. You can read all about my commute hereI have a really great route and love making exercise a practical part of my day.

This week, it was warm and sunny. The nice weather prompted me to wipe off our patio furniture, pull out a couple cushions and sit outside with my husband after work sipping wine, relaxing and enjoying the almost-like-summer feeling. Only one more month, before we open the pool and fill our pots with plants. Don't you just love summer?
This week, tulips (a gift from my In-Laws) blossomed into gorgeous red and yellow blooms adding a welcome burst of colour to our windowsill.
This week, we loaded our Santa Fe with an oak pedestal table and leaf, two chairs, corner desk and bean bag chair. Luckily everything fit for the trip to Guelph on Saturday.
Our son will be living in this house with five other students for his second year at University. His official move-in date is May 1st, but his landlord allows furniture to move in early. The house is a back split and much bigger than it looks from the front. 
The table and chairs look great in the kitchen. The toilet and 'fire-safety' steps behind the table will be moving to the basement bedroom and bathroom. The boxed wood flooring is also destined for the basement. The landlord is doing a super job with renovations. There are six bedrooms, three full washrooms and a large kitchen and living room. Our son looks happy already. 
This week was a Crochet-Free Week. I did not crochet at all, but I did sort through my stash. I still have a lot of yarn for making toys - all sorts of various colours in both DK and worsted weights. 
 
I also have mixture of chunky, fluffy yarns. Fluffy yarn is challenging to use, but I do like the look of toys made with it. With my yarn sorted and organized, I'm finally ready to decide on my next project.
It'll be another critter for sure. I like cats, so maybe a fluffy cat would be nice. What do you think? Should I make a cat? 
Upon reflection, our Maggie thinks that would be 'purrr-fect'. As always, I will be sure to share photos and possibly a pattern when I finish.


Be the first to comment - click on No comments: below

Monday 13 April 2015

Sunday Curbside Scores

On Sunday, I scored a few items I have been hoping to find for a while. The best part is these things were left at the curb and totally FREE. 

Our son is moving out of residence and into an unfurnished house in Guelph as he will be living with five other students for his second year at University. He was very happy to get an oak pedestal table from my parents. Since they didn't have any chairs to spare, I've been thinking about how to get some to match. I even checked Kijiji with no luck.  

Yesterday, when I stopped by my parents' house on my bike, they mentioned seeing a chair at the curb around the corner and down the hill. Since I would pass it on the way home, I decided to take a look. 

It looked great, so I knocked on the door to make sure it was OK to take. When I explained it was for our son, she offered another from her garage which was great. Since I was on my bike, I rode back up the hill (tough after a riding 35 km) and borrowed my parents' car to get them. 

Tonight I brought the chairs home. With a good wipe down and new pads on the legs, they look terrific. I think our son will be pleased.
 
 
He now has two solid wood chairs to match the table. How great is that? 

I'm not done yet. It must have been my lucky day yesterday.

When I got home after my bike ride, I took the dog for a walk around the block and found a really good high chair at the curb. The owners said it hadn't sold at a garage sale and was too big to fit in the car to take away. Luckily it was on wheels and just across the street from our house, so no trouble to take home.

The high chair was a bit sticky and dirty, but cleaned up beautifully. It is a commercial grade Rubbermaid high chair with an adjustable tray and wheels. It even has a safety strap - a perfect chair for our granddaughter when she visits this summer. 
It only took a bucket of soapy water, a few rags and some scrubbing to turn these curbside finds into treasures tonight.

When you put your intention out to the Universe, and watch for opportunities, it's amazing what shows up. I am really pleased with my Sunday Curbside Scores. 


Be the first to comment - click on No comments: below


Lucy Lamb

I am slowly working through my yarn stash making toys. I'd like to use up most of it before buying new to make another ripple blanket. Don't you think making toys is a good way to clear up yarn clutter? Luckily crochet critter clutter doesn't bother me.

This time I made a lamb and called her Lucy. Lucy loved posing to show off both her front side and back side. Isn't she cute with her big white fluffy body and lovely lamb ears? 
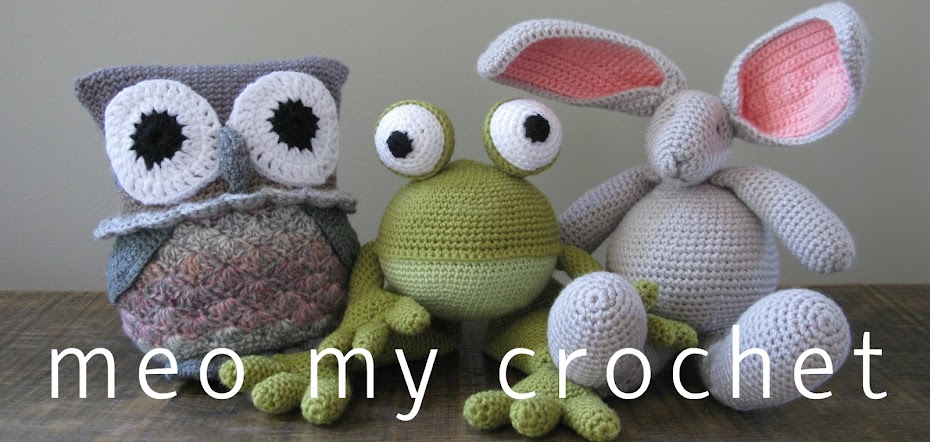
Lucy meets the rest of the gang and they hit if off right away.
To make Lucy, I used #4 worsted weight yarn for the legs, hands, head and inside ears, but the body, arms, hood and outside ears were made using #5 bulky weight yarn. The different yarn weights required pattern alterations to make everything fit. 

I've listed the alterations below in case you might like to make one too. 

Word of warning - my jot notes were scribbled and difficult to decipher, so I may have got it wrong in a few places. I do plan to test this pattern to make a kitten, so will be sure to provide updates if I find any errors.

lucy lamb PATTERN

PDF Version


Materials used:


partial ball of Patons Divine (#5 bulky weight yarn) in icicle white
partial ball of Patons Divine (#5 bulky weight yarn) in pink
partial ball of #4 worsted weight yarn in pink (100% acrylic)
partial ball of #4 worsted weight yarn in beige (100% acrylic)
Hook size = 3.5 mm
yarn needles to join pieces
Polyester Fiberfill for stuffing
Small amount of black yarn (for eyes)
Small amount of light pink yarn (for mouth)

Stitches used:


ch - chain stitch
ss - slip stitch
sc - single crochet
sc2tog - single crochet 2 together
Magic Circle - see how here (start each piece with magic circle)

Time to Complete - 10 hours (approximately)
Finished size - 13 inches tall

Legs (x2)


Start with pink worsted weight yarn
R1 - 6 sc (6)
R2 - inc x6 (12)
R3 - (sc inc) x6 (18)
R4 - (2 sc inc) x6 (24)
R5-R6 - sc around (24)
R7 - sc2tog x4 + 16 sc (20)
R8 - sc2tog x4 + 12 sc (16)
R9-R13 - sc around (16)
R14 - (3 sc inc) x4 (20)
R15-R16 - sc around (20)
R17 - (4 sc inc) x4 (24)
Switch to white Patons Divine yarn
R18 - sc around (24) 

Body


Use white Patons Divine yarn to join legs
R19 - sc around (50)
R20 - sc around (50)
R21 - (5 sc inc) x 7 + 3 sc (60)
R22 - sc around (60)
R23 - (8 sc inc) x 6 (66)
R24 - sc 24 + (sc inc + 2 sc) x6 + 25 sc (68)
R25 - sc around (68)
R26 - sc around (68)
R27 - sc around (68)
R28 - sc around (68)
R29 - (6 sc dec) x7 + 2 sc dec (60)
R30 - sc around (60)
R31 - sc around (60)
R32 - sc around (60)
R33 - (8 sc dec) x6 (54) 
R34 - 7 sc dec dec + 23 sc dec dec + sc to marker(50)
R35 - (3 sc dec) x10 (40)
R36 - sc around (40)
R37 - (8 sc dec) x4 (36)
R38 - sc around (36)
R39 - (4 sc dec) x6 (30)
R40 - sc around (30)
R41 - (2 sc dec) x6 (24)
R42 - sc around (24)
R43 - (1 sc dec) x6 (18)
R44 - sc around (18)
Finish off leaving a long tail for joining.


Arms (x2)


Start with pink worsted weight yarn
R1 - 6 sc (6)
R2 - inc x6 (12)
R3 - (sc inc) x6 (18)
R4 - sc around (18)
R5 - (4 sc dec) x3 (15)
R6 - sc around (15)
R7 - (3 sc dec) x 3 (12)
R8 - sc around (12)
R9 - (4 sc dec) x 2 (10)
R10-R11 sc around (10)
Switch to pink Patons Divine yarn
R12-R26 - sc around (10)
Switch to white Patons Divine yarn
R27 - sc around (10)
Finish off and cut yarn leaving a long tail for joining. Stuff only hands and part way up arm.

Head


Use beige worsted weight yarn.
R1 - 6 sc (6)
R2 - inc x6 (12)
R3 - (sc inc) x6 (18)
R4 - (2 sc inc) x6 (24)
R5 - (3 sc inc) x6 (30)
R6 - (4 sc inc) x6 (36)
R7 - (5 sc inc) x6 (42)
R8 - (6 sc inc) x6 (48)
R9 - (7 sc inc) x6 (54)
R10 - (8 sc inc) x6 (60)
R11 - sc around (60)
R12 - sc around (60)
R13 - sc around (60)
R14 - sc around (60)
R15 - sc around (60)
R16 - sc around (60)
R17 - sc around (60)
R18 - sc around (60)
R19 - sc around (60)
R20 - (8 sc dec) x6 (54)
R21 - sc around (54)
R22 - (7 sc dec) x6 (48)
R23 - (6 sc dec) x6 (42)
R24 - (5 sc dec) x6 (36)
R25 - (4 sc dec) x6 (30)
R26 - (3 sc dec) x6 (24)
R27 - (2 sc dec) x6 (18)
R28 - (2 sc dec) x3 + 6 sc (15)
R29 - sc around (15)
R30 - sc around (15)
Finish off and cut yarn leaving a long tail for joining. Stuff head and neck firmly to hold shape.

Hood


Use white Patons Divine yarn.
R1 - 6 sc (6)
R2 - inc x6 (12)
R3 - (sc inc) x6 (18)
R4 - (2 sc inc) x6 (24)
R5 - (3 sc inc) x6 (30)
R6 - (4 sc inc) x6 (36)
R7 - (5 sc inc) x6 (42)
R8 - (6 sc inc) x6 (48)
R9 - sc around (48)
R10 - sc around (48)
R11 - sc around (48)
R12 - sc around (48)
R13 - sc around (48)
R14 - sc around (48)
R15 - sc around (48)
R16 - sc around (48)
R17 - sc around (48)
R18 - sc around (48)
R19 - sc around (48)
R20 - sc around (48)
R21 - (8 sc dec) x6 (42)
R22 - ss loosely around (42)
Finish off and cut yarn leaving a long tail for joining. Position on head as shown in photos above. After attaching head to body, I like to wrap the tail from the hood around the neck to cover joining stitches.

Ears


I used this pattern for lamb ears provided by blogger Sarah at RepeatCrafterMe. The inner ear was made with a starting chain of 8 instead of 6, so it would fit nicely inside the outer ear made with bulky weight yarn.


Be the first to comment - click on No comments: below